http://www.lostmarble.com/misc/warp_fie ... _field.swf
And here's the Moho file for the above animation:
http://www.lostmarble.com/misc/warp_fie ... orial.moho
Here's a little tutorial on the technique.
First, draw a grid in Moho. Make sure the lines of the grid have plenty of intermediate points, as they're going to be warped around a lot:
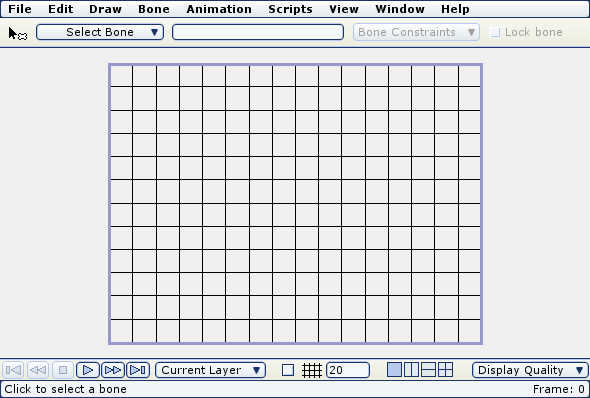
The grid will be used as a reference for setting up the warp field - you don't want to see it in the final animation. So, in the Project Settings dialog, turn on "Don't render this layer" for the grid.
Next, create a bone layer and put the grid inside it. Add a few bones:
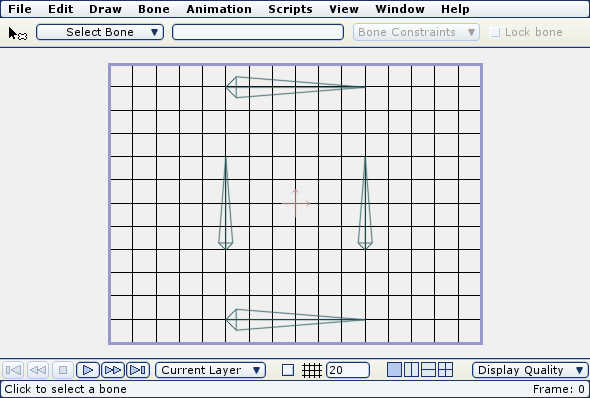
The bones in this example are set up as follows: the top and bottom horizontal bones are not meant to move - they are intended to hold objects that are above or below the warp field. The middle bones will do the warping. How you set up the bones depends on what kind of warping effect you want - in this example, we're squeezing an object through a small opening.
Next, set the current time to frame 1 and move some (or all) of the bones around:
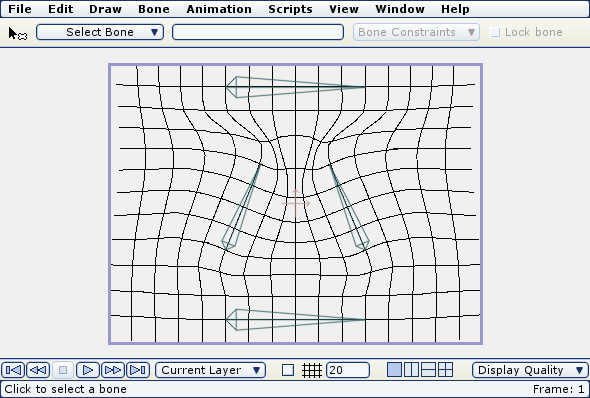
Now you can see the purpose of the grid. The grid shows how the bones will affect the space they enclose. The center of the screen is being squeezed here, and any objects in that space will also be squeezed.
To get the desired warping shape, you will probably need to adjust the strengths of the various bones so that they work together the way you want.
Once you have the bones adjusted how you want, create a new layer for a background - place this layer outside the bone layer so the bones don't warp it:
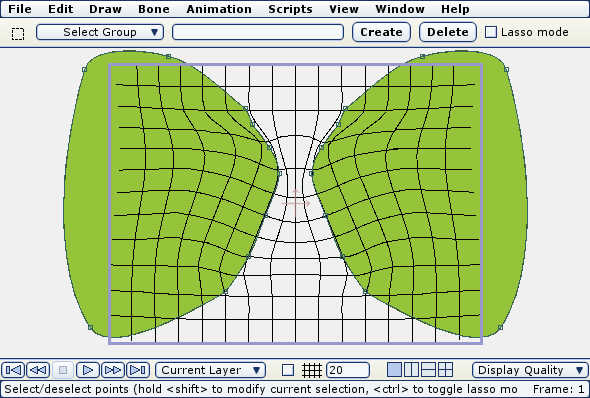
Draw some kind of background features to fit the warped space. Alternatively, it might make sense to draw the background first, and adjust the warp field to fit it, it's up to you.
Next, create a new layer inside the bone group and draw the object(s) that you want to get warped:
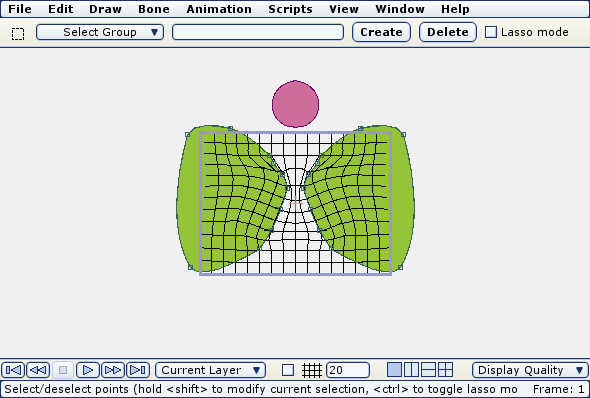
Here we drew a circle (with lots of extra control points), but any Moho object should work. The circle was drawn up above the warp field, and because of the stable top bone, the circle still looks like a circle.
Now, move the time further along (in this case to frame 72), and move the new object across the warp field using the Layer Translation tool:
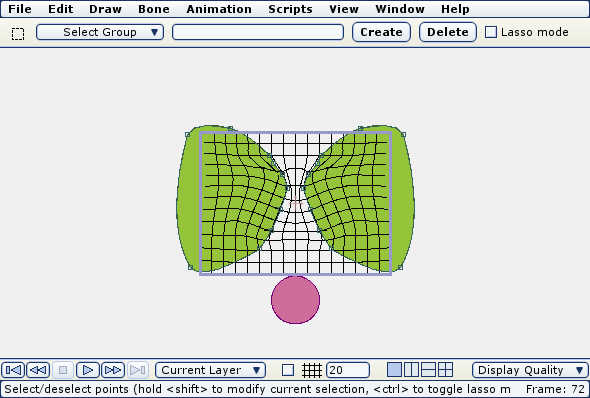
When moving objects through a warp field, it's very important to use the Layer tools to move them. The Point Translation tool would not work for this purpose because point movement is designed to be immune to this effect (you often need to combine bone and point motion to get subtle movements).
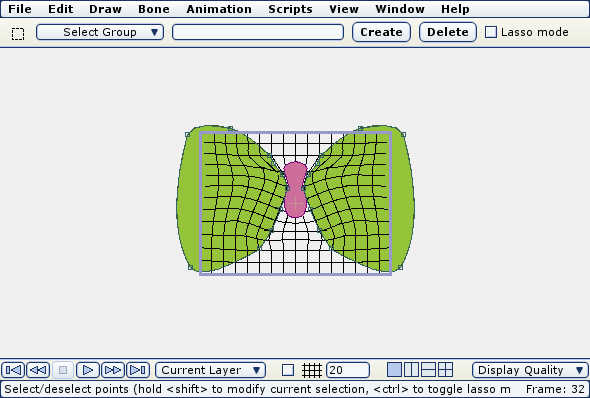
At the bottom of the warp field, the circle also looks like a regular circle because of the stabilizing bottom bone. The interesting part if when you play back the animation and watch the intermediate frames:
Here's what the general layer setup looks like:
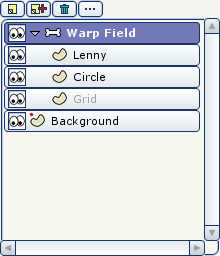
In the final animation, a character was added in addition to the circle. Because both objects pass through the warp field, they bone get deformed in the same way.
Are warp fields useful? I don't know, but they're fun to play with. Besides squeezing through tight spaces, warp fields could be used to create wavy underwater effects, funhouse mirrors, or maybe refractions through glass and lenses.


