Water Tutorial
Posted: Tue Jun 28, 2005 10:09 am
How to create water effects is a question that comes up from time to time. Water can be very complex, and there are all kinds of styles of "water" for a cartoon animation. There are probably endless ways to create water effects in Moho. Here's one.
First, here's a look at the effect I'll be showing you how to create:
http://www.lostmarble.com/misc/water_tu ... erfall.mov
And here's the Moho file if you want to download it and take a look:
http://www.lostmarble.com/misc/water_tu ... rfall.moho
Now, on to the instructions. There's plenty of room for tweaking in these directions, so feel free to experiment and try changing things here and there.
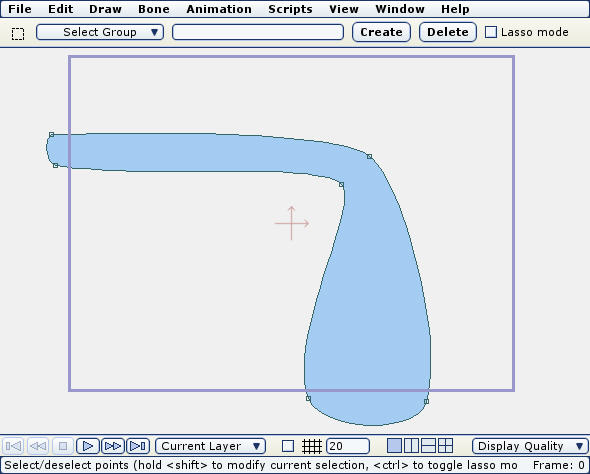
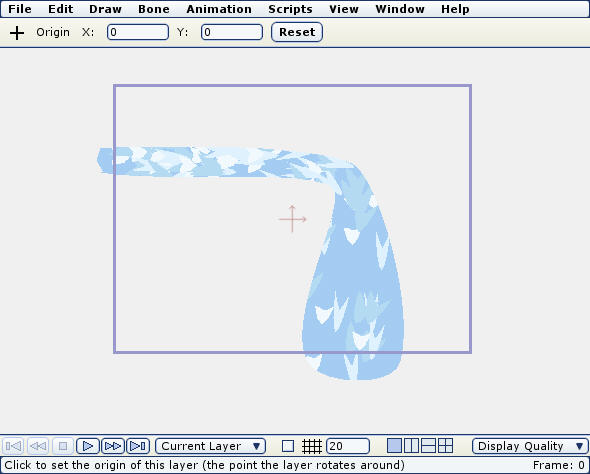
First, draw the shape of your flowing water (a river with a waterfall in this example) in a vector layer called "River":
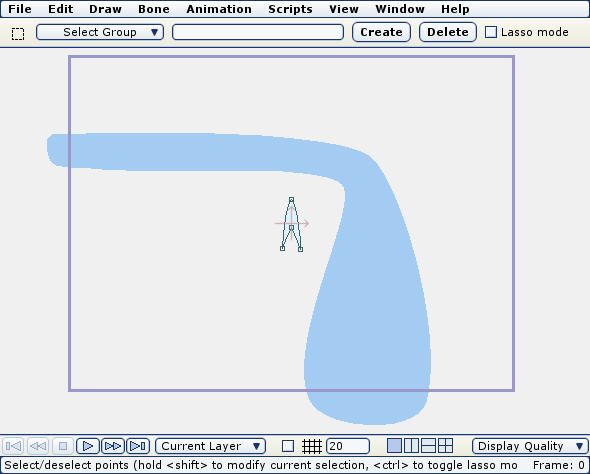
Now create a new vector layer called "Ripple" and draw a little upward-pointing arrow. Fill the arrow with a light pale blue, partially transparent color and give it a soft edge fill effect:
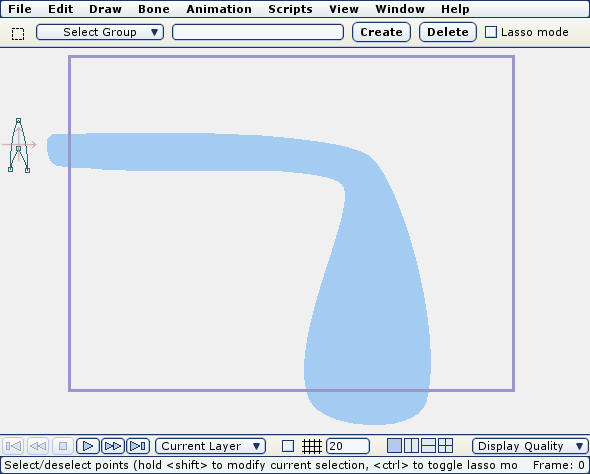
Use the Translate Layer tool to move the ripple layer to the beginning of the water stream:
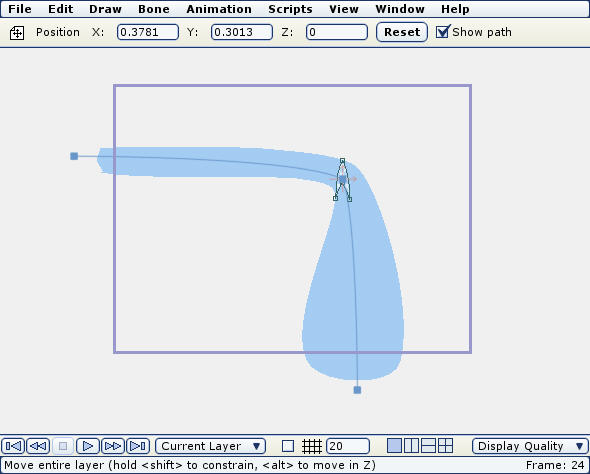
Next, set the current time to the duration of the flowing animation (in this case frame 48 ), and use the Translate Layer tool to move the ripple to the end of the water flow:
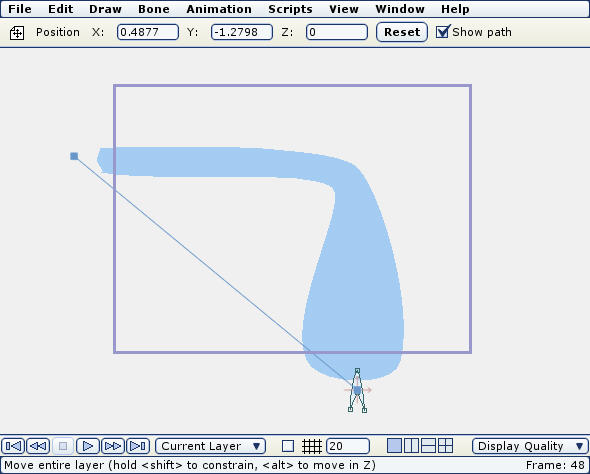
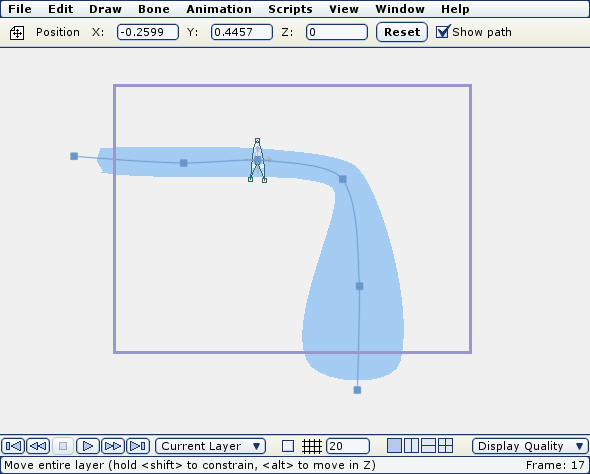
The blue line shows the motion the ripple layer will take. Now go to the middle frame of the animation, and position the ripple inside the river's flow:
You can add more keyframes using Translate Layer if you want to match the river's flow more closely:
Now, double-click the ripple layer and turn on "Rotate to follow path" - this will make the ripple point in the direction of the river's flow:

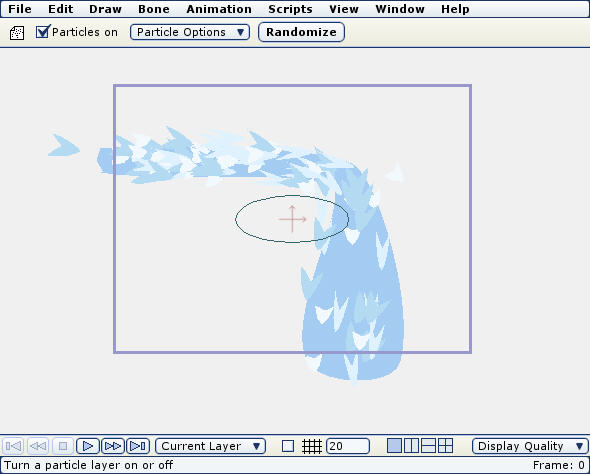
Next, create a new particle layer and add the ripple layer to the particle group. The particle layer should have a lifetime set to the length of the ripple's animation, no velocity or acceleration, and adjust the particle source width and height so that the ripples fill up most of the river outline. Don't worry if they go outside it right now. The number of particles you'll need all depends on the size of the river, the size of the particles, the length of the animation, etc. I used 750 particles in this example:
To add some variety, duplicate the ripple layer two or three times, and modify each copy slightly. Use a slightly different shade of pale blue, and move the control points around a bit to change the "arrow" shape of the ripple a bit:
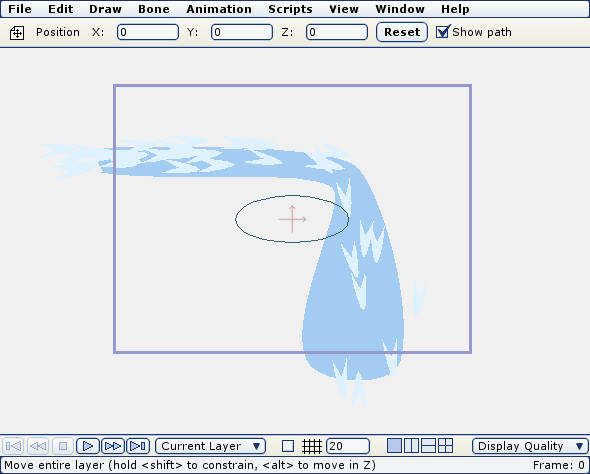
Finally, put both the river layer and the particle layer inside a group, and use masking to make the ripples only visible where they are inside the river outline: (In the final animation, the river outline is blurred a bit to soften its abrupt edges.)
That's it! Let's see what variations and improvements on this technique you can come up with.
First, here's a look at the effect I'll be showing you how to create:
http://www.lostmarble.com/misc/water_tu ... erfall.mov
And here's the Moho file if you want to download it and take a look:
http://www.lostmarble.com/misc/water_tu ... rfall.moho
Now, on to the instructions. There's plenty of room for tweaking in these directions, so feel free to experiment and try changing things here and there.
First, draw the shape of your flowing water (a river with a waterfall in this example) in a vector layer called "River":
Now create a new vector layer called "Ripple" and draw a little upward-pointing arrow. Fill the arrow with a light pale blue, partially transparent color and give it a soft edge fill effect:
Use the Translate Layer tool to move the ripple layer to the beginning of the water stream:
Next, set the current time to the duration of the flowing animation (in this case frame 48 ), and use the Translate Layer tool to move the ripple to the end of the water flow:
The blue line shows the motion the ripple layer will take. Now go to the middle frame of the animation, and position the ripple inside the river's flow:
You can add more keyframes using Translate Layer if you want to match the river's flow more closely:
Now, double-click the ripple layer and turn on "Rotate to follow path" - this will make the ripple point in the direction of the river's flow:
Next, create a new particle layer and add the ripple layer to the particle group. The particle layer should have a lifetime set to the length of the ripple's animation, no velocity or acceleration, and adjust the particle source width and height so that the ripples fill up most of the river outline. Don't worry if they go outside it right now. The number of particles you'll need all depends on the size of the river, the size of the particles, the length of the animation, etc. I used 750 particles in this example:
To add some variety, duplicate the ripple layer two or three times, and modify each copy slightly. Use a slightly different shade of pale blue, and move the control points around a bit to change the "arrow" shape of the ripple a bit:
Finally, put both the river layer and the particle layer inside a group, and use masking to make the ripples only visible where they are inside the river outline: (In the final animation, the river outline is blurred a bit to soften its abrupt edges.)
That's it! Let's see what variations and improvements on this technique you can come up with.
